


Disc Brake Servicing
 19 January 2015
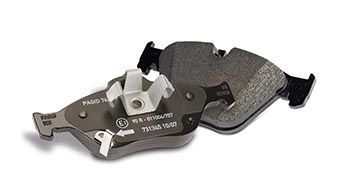
If you’re carrying out disc brake servicing, you will be familiar with all the procedures that are required; however, these step-by-step instructions should help you service disc brakes as safely and efficiently as possible. Ensure you have the correct tools and equipment to assist you from the start, and then follow the procedures in our guide below.
Tools required:
? Disc brake piston spreader tool
? Selection of suitable hand tools
? Hub cleaning tool
? Wheel re-fitting tools and a torque wrench
2. Using the correct tools, remove the caliper and suspend in a safe place. DO NOT suspend the caliper from its brake hose. Remove the brake pads, carrier and brake discs. NOTE actual procedure will depend upon type of caliper encountered.
3. Using either a hub cleaner, wire brush, emery cloth or similar, remove all traces of rust from the hub mating surfaces and clean down surface with suitable brake cleaning solution. Use a suitable DTI to measure hub lateral run-out – not to exceed 0.030mm. Apply a small amount of non-conductive, heat resistant grease (not copper grease) sparingly to the hub contact point.
4. Fit the brake discs removing protective coating with brake cleaner where necessary. Secure with wheel fixings and using a DTI, check the lateral run-out of the brake disc 10 to 15mm below the outer disc surface. Disc run-out must not exceed 0.070mm. Where it does, remove from the hub and reposition.
5. Remove all traces of dirt and corrosion from the caliper guides using a suitable wire brush and a caliper file where necessary.
6. Use a suitable brake hose clamp and clamp the brake hose. Place a brake fluid capture bottle onto the bleed nipple, and using a suitable piston retracting/wind-back tool, retract the piston with the bleed nipple open. IMPORTANT – Remove the brake hose clamp.
7. Lubricate the guide surfaces of the caliper bracket using a suitable non-conductive, heat resistant and solids free (non-metallic) lubricant. NOTE copper grease must not be used for this purpose.
8. Check the replacement brake pads are correctly marked with the UNECE Type Approval Mark R90 and fit them ensuring correct positioning of all loose shims and retaining clips. Replace the caliper torqueing a guide pins and carrier bolts to the correct torque values.
9. Check compatibility of wheel and fixings and clean the mating surfaces. Refer to technical data for lubrication instructions for wheel fitment. Firm wheel up in the correct sequence and torque the fixings to the correct value with the wheel stress free and without load. Zero torque wrench after use.
10. Apply the brake pedal until a firm pedal pressure is encountered.
11. Check and top up the level of the brake fluid, ensuring that any spillage is immediately cleaned up.
12. Road test the vehicle to check for correct operation of the brakes. Upon return, remove any grease marks from the vehicle and advise the customer on the correct bedding-in process.